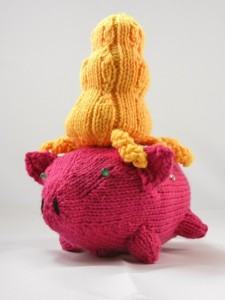
The interaction design for the singing pig was to have a different song start playing when a different wig is placed on the pig. The pig needed to stand by itself without being connected to anything else and the wigs needed to look like nothing out of the ordinary (ordinary wigs for pigs, that is). I wanted the way the wigs attach to the pig to be no different than any other stuffed toy, but they also need to pass current and electrically trigger events on an Arduino. Metal snaps were my go-to item as they very nicely interface between “hard” components (things you normally associate with a circuit) and “soft” components (conductive thread).
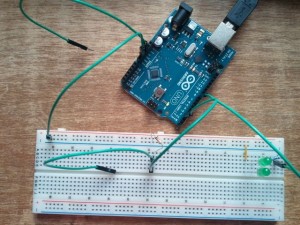
The circuit is quite simple: an Arduino controlling a pair of LEDs in parallel on the same pin; a buzzer on another pin; and three digital switches with pull down resistors on three other pins. Below is an early prototype on a breadboard:
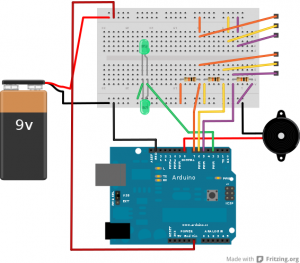
Here’s the full breadboard prototype:
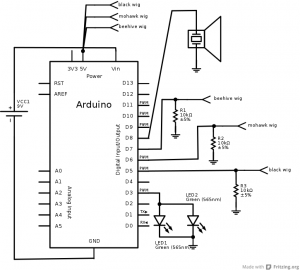
And here’s the circuit diagram:
Excluding the Arduino and 9v battery, all of the components were attached to the inside of the pig or wigs. Only sewing snaps, the LED eyes, and the on/off switch were exposed to the outside of the toy. Conductive thread was used for runs between components and to connect the snaps to the interior circuit, but since the circuit centered around an Arduino Uno, the soft circuit needed to interface with header pin connections. To do this, wire was stripped and looped around needle-nosed pliers at one end and then sewn into the circuit. The other end of the wire then connected to the Arduino. This was not the original intention – I had wanted to use an Arduino Mini Pro and solder the connections into place, but that proved to be too ambitious within the Christmas deadline.
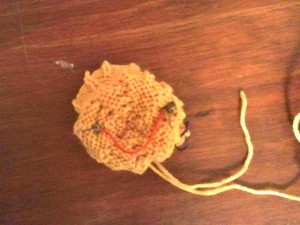
Inside each wig was a wire sewn to two male snaps. I used wire instead of conductive thread because it’s a more robust material and as it was hidden inside the wig, wasn’t worried about it being bulkier than thread. Below is the inside of the beehive wig before it was completely knit and stuffed.
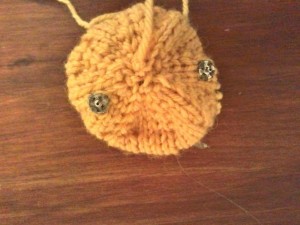
And the bottom of the beehive wig from the outside:
This is great! I’m going to try to make something similar. Did you say already how you got the tunes?
I just posted the next bit of documentation about the coding of the music. In short, I found midi files that I hand transcribed into pitch and duration for PWM.