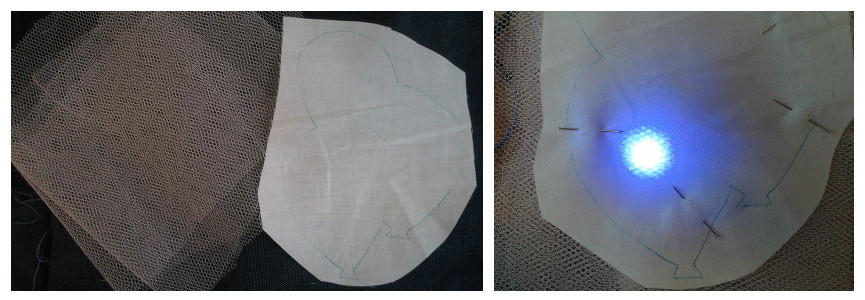
To round out 2013, Â I’m going to post three projects I completed in November and December. All three were ideas that had been thought about for varying lengths of time, but were each executed in a single day. The first two, both wearable technology pieces, are more related than the third, a bingo card game.
Baby Onesie
This project was a very quick commission to provide a proof of concept for what wearable technology for children could be. It was part of an investigation for a funding bid into whether wearable tech could enhance play between parent and child.
Babyglow Onesie from Becky Stewart on Vimeo.
It was a very quick turnaround. I was approached on a Tuesday and the piece was needed the following Saturday. It was requested that the garment be a onesie or baby-grow, but that the interaction was largely up to me. The point of the piece was to demonstrate to parents in a workshop what a finished piece of wearable tech could look like as they were going to be shown other sensors and actuators outside of a finished piece.
I ordered in some kit on the Wednesday and Thursday then started and completed the piece on the Friday.
The concept was very simple: an appliqué of three balloons that appear white when the garment is not powered, light up in three different colours and then change colours when the child jumps up and down. This movement was detected by an accelerometer on the right leg.
The onesie was purchased off the high street. The appliqué was created by using several layers of white tulle as a diffuser and white cotton fabric. The tulle was an ok diffuser, certainly acceptable within the time limits and materials on hand for experimentation, but I would want to improve it if the project were to move forward. The photo looks less diffuse than it appears in person.

The underlying electronics are three Adafruit NeoPixels controlled by a LilyPad SimpleSnap with a LilyPad Accelerometer on the leg. The NeoPixels were the breadboard-friendly version as opposed to the ones explicitly designed for soft circuits as they were the easiest to get ahold of quickly. They don’t ship with the header pins soldered on, so you can use the via holes for the header pins for sewing.

As there were some longer runs for the circuit, I decided to try conductive ribbon for the first time. The type I chose advertised a low resistance and that it didn’t short if folded on itself. Overall, it was much better than working solely with conductive thread, but the transition from the ribbon to the components is a little awkward.
The Lilypad was attached to the lower back using snaps. The placement was in hope that it would be the most difficult place for the child to reach. It was placed low on the back so that it wouldn’t poke into them if they leaned back against something.
The SimpleSnap comes with female snaps already soldered onto the pads, which seemed convenient as I would have done that myself anyway. However, it didn’t actually come with the corresponding male snaps which was a big pain. It took a while to track down the right size snaps and now I have a handful of females snaps leftover without male pairs. However, the integrated battery is a big plus.

If I had more time, I would have created an appliqué to cover the accelerometer as well.
There is nothing particularly clever or groundbreaking in the code, but it’s up on Github.
